
Picking
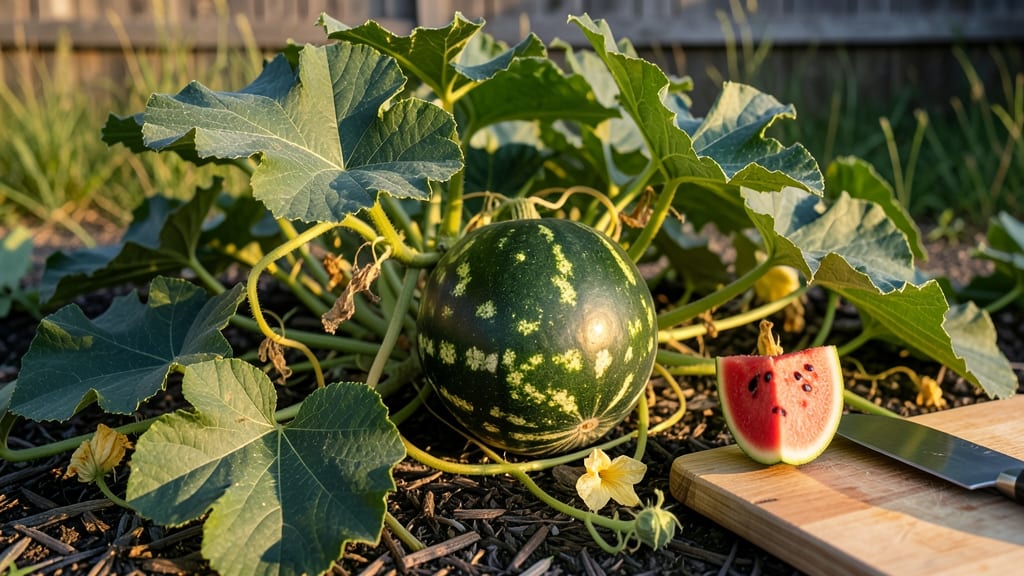
To pick watermelon from your garden at the perfect moment means the difference between a juicy, sweet slice and a mealy disappointment.
Nothing beats the sweet victory of harvesting your own 🍉—except maybe the disappointment of a mealy, underripe fruit. Timing your harvest perfectly ensures juicy, flavorful slices every time, but how do you know when those vines are ready?
Most gardeners rely on a mix of visual cues—like that creamy yellow spot where the melon rested on the ground—and tactile checks, such as the classic thump test. But even experienced growers sometimes miss the mark, especially when heatwaves or cool nights throw off the usual schedule.
Below, I break down the exact signs to watch for, from rind color shifts to the telltale brown tendril, plus how to adjust for your local climate. By the end, you’ll never second-guess whether that watermelon is ready—or still needs a few more days on the vine.

Watermelon ripeness signs: color, texture & size guide for garden harvest
Harvesting watermelons at the perfect moment transforms your garden into a sweet treasure trove. The key lies in reading your melons like a book—each page reveals clues about ripeness through rind color, stripe darkness, and even the field spot development.
Seedless varieties often mature slightly faster than their seeded counterparts, so pay extra attention to these visual cues.
Start by examining the underside of the melon. When the white patch near the stem turns creamy yellow, that’s nature’s green light. This color shift signals the melon is ready to harvest, especially in warmer climates where ripening speeds up.
For cooler regions, this yellowing may take longer—sometimes up to 10 extra days.
The stripes on the rind also darken as the melon matures. Deep, bold stripes indicate ripeness, while faint or patchy stripes suggest it needs more time. Seedless varieties often develop more uniform coloration, so their stripes may appear less pronounced but still darken significantly.
Don’t overlook the field spot—the creamy patch on the ground-side of the melon—it should turn from white to a yellowish hue.
Size matters too! A ripe watermelon typically reaches 8-12 pounds, though smaller varieties like Sugar Baby may mature at 4-6 pounds. Measure the diameter—most watermelons should be at least 10-12 inches wide at the widest point.
If the melon feels heavy for its size, that’s another sign it’s ready to pick.
Regional variations play a role in ripening too. In hot, dry climates, watermelons may ripen faster and develop deeper colors. Meanwhile, in cooler or humid regions, the process slows down, and stripes may take longer to darken. Adjust your expectations based on your local growing conditions.
Don’t forget to run your thumb along the stem end of the melon. If the skin feels slightly rough or dull (rather than waxy), it’s a good sign. A ripe watermelon’s rind should also resist pressure when you press your thumbnail—it shouldn’t dent easily.
For seedless varieties, this texture check is especially important since they often lack the classic "thump" sound when tapped.
Listen for the thump test, but use it as a secondary cue. Tap the melon with your knuckles—if it sounds hollow or deep, it’s likely ripe. However, avoid over-relying on this method, as small melons or those in container gardens may not produce a clear sound.
Combine the thump test with the visual clues above for the most accurate results.
Finally, check the stem. A ripe watermelon’s stem should snap easily when bent gently. If it resists or doesn’t break cleanly, the melon needs more time. This is especially true for heirloom varieties, which often take longer to mature.
Once the stem snaps, use a sharp knife or pruners to cut the melon from the vine, leaving a small stem attached to prevent rot.
Timing your harvest correctly ensures your watermelons are sweet, juicy, and flavorful. By combining these visual and tactile cues, you’ll avoid the heartbreak of a mealy, underripe melon and enjoy the true taste of summer from your garden. Happy harvesting! 🍉
The ultimate watermelon thump test: how to test ripeness without cutting open
Mastering the watermelon thump test is my secret weapon for avoiding mealy disappointments. This simple tactile method lets you gauge ripeness by sound—no knife required! The key lies in where and how hard you thump, plus what your ears (and hands) should detect.
Let’s break it down so you’ll never guess wrong again.
Start by locating the field spot—that creamy yellow patch on the melon’s underside where it rested on the ground. This is your sweet spot for testing. Use your fingertips (not knuckles) to give it a firm but gentle tap.
A ripe watermelon should sound hollow, like knocking on a drum, with a deep thud that lingers for a second.
⚠️ callout-warning ⚠️
⚠️ Common Thump Test Mistakes
- 🤏 Thumping too hard → Can bruise the melon or give false "ripe" sounds
- 🎵 Tapping wrong spot → Test the field spot, not the stem end or sides
- 🌧️ Testing after rain → Water fills cavities, making melons sound ripe when they’re not
- 🌡️ Ignoring temperature → Hot days make melons softer; test in morning shade
Pro Tip: Combine the thump test with tendril color—the vine’s tendril near the fruit should turn brown when the melon’s ready.
For small-space gardens or container-grown melons, the thump test gets trickier. Instead, try the fingerpress test: Press your thumbnail into the rind. If it leaves a slight dent that slowly rebounds, it’s ripe.
A melon that springs back instantly is underripe, while one that stays dented may be overripe.
Listen for subtle differences in sound. A ripe watermelon’s thud should be deep and resonant, almost musical. Underripe melons produce a high-pitched thwack, while overripe ones sound dull and flat.
Practice on a few melons at your local market to train your ear—this skill takes just a few tries to master!
Don’t rely solely on the thump test, though. Pair it with visual cues: A ripe watermelon’s stripes darken, its underside turns yellow, and the stem end dries to a dull tan.
When these signs align with your thump results, you’re golden—time to harvest before pests or weather beat you to it!
Remember, patience pays off. Watermelons ripen best on the vine, so wait until all signs point to perfection. Once you’ve nailed the thump test, you’ll be the envy of the neighborhood with juicy, sweet melons every harvest season. Happy thumping! 🍉