
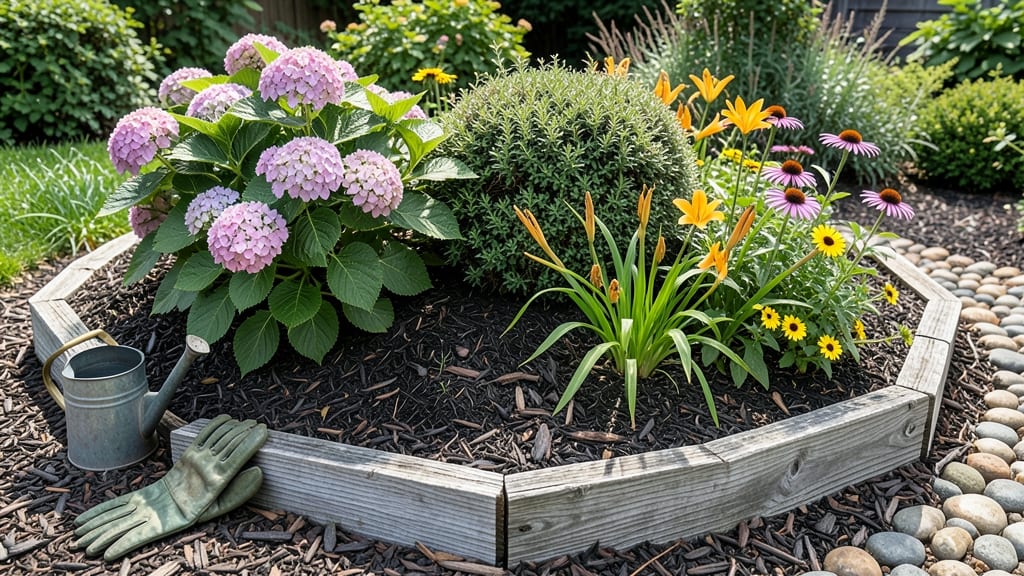
Mound Garden Bed Ideas: 7 Space-Saving Layouts for Small Yards

Tools

Mound Garden Bed Ideas: 7 Space-Saving Layouts for Small Yards

Creating mound garden bed ideas lets you transform even the smallest yard into a lush, productive space with minimal footprint.

Picture this: no more wasted corners or uneven ground—just raised, custom-shaped beds that fit your space perfectly while improving drainage and accessibility. Whether you’re growing veggies, herbs, or flowers, these elevated designs work like magic in tight backyards, balconies, or urban patios.

Beyond space-saving, mound beds solve common gardening headaches like poor soil quality or waterlogging. With the right layout, you can even create stunning visual focal points that blend function with beauty—think rustic stone edges, sleek modern lines, or whimsical spiral designs.

Below, I’ll walk you through 7 space-saving layouts, step-by-step building tips, and the best plants to thrive in elevated beds—so you can start designing your dream garden today.

7 Creative mound garden bed layouts for small spaces

If you're working with limited space but dream of a lush garden, mound garden beds are your secret weapon. These elevated designs transform tight areas into productive, visually striking spaces while improving drainage and accessibility.

Whether you're growing herbs, vegetables, or flowers, these 7 space-saving layouts will inspire your next project—no matter how small your yard.

One of my favorite designs is the spiral mound bed, which creates a natural flow while maximizing growing space. This layout works perfectly for companion planting, like pairing basil with tomatoes or marigolds with peppers.

The curved shape also makes it easier to reach every corner, reducing strain on your back. For urban balconies, a tiered mound with pockets for dwarf varieties can turn a tiny patio into a mini farm.

Before diving into designs, let’s compare the best mound garden bed layouts based on space efficiency, plant compatibility, and maintenance needs. Below, you’ll find a side-by-side breakdown to help you choose the perfect fit for your garden.

Layout Type Best For Space Efficiency Sunlight Access Maintenance
Spiral Mound Herbs, Flowers, Small Veggies ⭐⭐⭐⭐⭐ (Maximizes edges) ⭐⭐⭐⭐ (Full sun exposure) ⭐⭐⭐ (Easy weeding)
Tiered Pocket Dwarf Tomatoes, Peppers, Strawberries ⭐⭐⭐⭐ (Vertical space) ⭐⭐⭐⭐ (Adjustable levels) ⭐⭐⭐⭐ (Low weeding)
Rectangular Raised Row Crops (Carrots, Lettuce) ⭐⭐⭐⭐ (Structured) ⭐⭐⭐ (Even exposure) ⭐⭐⭐⭐ (Easy access)
Circular Keyhole Perennials, Shrubs, Bulbs ⭐⭐⭐⭐ (Center compost) ⭐⭐⭐ (Partial shade ok) ⭐⭐ (Mulching needed)
Square Grid Mediterranean Herbs (Rosemary, Thyme) ⭐⭐⭐ (Moderate) ⭐⭐⭐⭐ (Full sun) ⭐⭐⭐⭐ (Drought-tolerant)
Half-Moon Edge Border Plants (Nasturtiums, Calendula) ⭐⭐⭐⭐ (Curved edge) ⭐⭐⭐⭐ (Sun exposure) ⭐⭐⭐ (Pruning needed)
Spiral with Trellis Cucumbers, Beans, Morning Glories ⭐⭐⭐⭐ (Vertical growth) ⭐⭐⭐

How to build a durable mound garden bed in 5 steps

A durable mound garden bed solves common gardening challenges like poor drainage and limited space while creating a stunning focal point. Unlike traditional in-ground beds, mounds elevate your plants, improve airflow, and reduce soil compaction.

Whether you're growing vegetables, herbs, or flowers, this method extends your growing season and minimizes weeds. The key lies in the foundation—proper soil, sturdy edging, and smart plant placement ensure your mound lasts for years.

Before breaking ground, choose a sunny, level spot with at least 6 hours of sunlight. Avoid low-lying areas prone to water pooling. Test your soil’s drainage by digging a hole, filling it with water, and timing how long it takes to drain.

If it sits for more than 30 minutes, amend the area with sand or compost to improve flow. Skipping this step risks root rot and stunted growth, even in elevated beds.

5 Steps to Build Your Mound Garden Bed

  1. Step 1: Mark and Shape the Base
    Outline your mound with stakes and string or a garden hose. For a 3-foot-wide mound, aim for a 4-foot base diameter to ensure stability. Use a shovel to remove sod or topsoil, then mound the remaining soil into a gentle slope (avoid steep angles).
  2. Step 2: Layer Soil for Drainage
    Start with a 4-inch layer of gravel or broken bricks at the base for drainage. Top with 6 inches of coarse sand, then add 12 inches of high-quality garden soil mixed with compost (ratio: 3 parts soil, 1 part compost). Avoid clay-heavy soil to prevent compaction.
  3. Step 3: Reinforce Edges
    Secure the mound’s perimeter with landscape fabric or hardware cloth to block weeds. For edging, use bricks, pavers, or natural stone buried 4–6 inches deep. Alternatively, line the base with corrugated metal or cedar planks for a rustic look.
  4. Step 4: Plant Strategically
    Place tall plants (e.g., tomatoes, sunflowers) on the north side to avoid shading shorter varieties. Use dwarf or sprawling plants (e.g., basil, lettuce) on the south or east edges. Leave 12–18 inches between plants for airflow, and mulch with straw or wood chips to retain moisture.
  5. Step 5: Water and Maintain
    Water deeply at the base of the mound (not the top) to encourage root growth. Use a drip irrigation system or soaker hose for efficiency. Every 3–4 months, top off the soil with compost and check for erosion. Reinforce edges annually with fresh mulch or stones.

One of the biggest mistakes I see is overwatering mound beds. Since they’re elevated, water drains quickly, but roots still need consistent moisture. Use your finger to check soil depth—if the top 2 inches feel dry, it’s time to water.

For container-grown plants, like herbs in pots on top of the mound, monitor soil moisture daily during heatwaves. A self-watering reservoir buried at the base can automate care for busy gardeners.

To extend your mound’s lifespan, rotate heavy plants like squash or pumpkins to prevent soil compaction on one side. If your mound starts to flatten over time, simply add fresh soil or compost to restore its shape.

With proper care, a well-built mound garden bed can thrive for 5–10 years, making it a worthwhile investment for small-space gardeners. The best part? You’ll harvest more with less effort!

For extra durability, consider adding a wire mesh cage around the base to deter burrowing animals like gophers. If you’re in a windy area, secure taller plants with stakes or trellises early in the season.

With these tips, your mound garden bed will stay productive and picturesque for seasons to come. Happy planting!

★★★★★4.6(8 reviews)
Categories Tools