
Shrubs
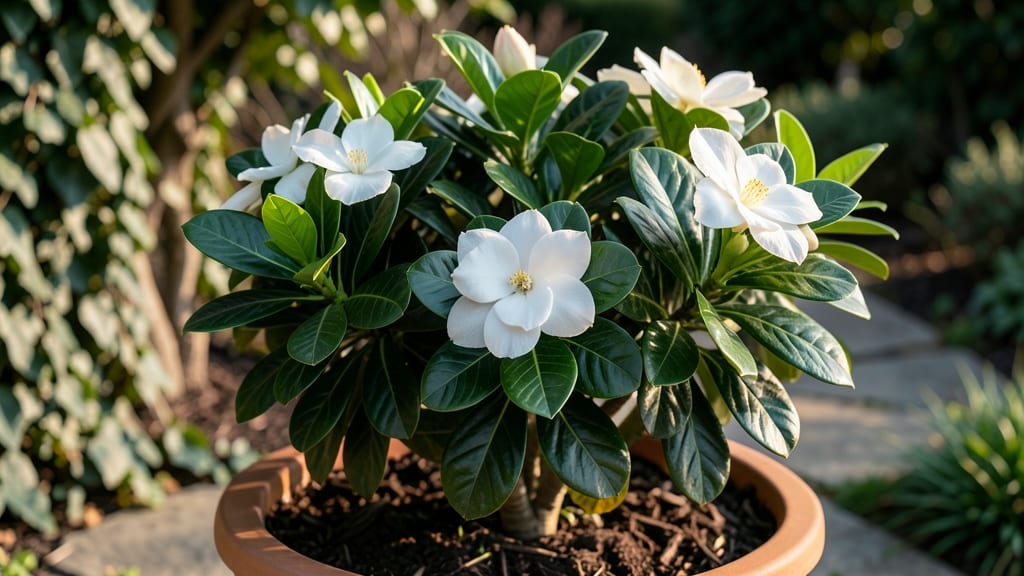
A full grown gardenia 🌸 can reach 6 feet tall with the right care, but many gardeners miss the mark on pruning and upkeep—leaving their plants struggling to bloom.
Picture this: your gardenia’s glossy leaves are thriving, but the flowers are sparse or the fragrance fades too soon. The issue isn’t always the plant—it’s often how you’re caring for it.
This guide cuts through the guesswork with proven pruning techniques and seasonal adjustments to keep your gardenia lush, fragrant, and full of blooms.
From when to trim for maximum flowers to soil pH tweaks that unlock vibrant growth, we cover the essentials for a thriving gardenia. Whether you’re dealing with yellowing leaves or sparse blooms, these tips will help you revive and maintain your plant’s natural beauty year-round.
Ready to transform your gardenia into a fragrant, bloom-packed centerpiece? Let’s dive into the care routine that keeps it healthy and stunning from spring through fall.
How to prune a full grown gardenia for maximum blooms
A full grown gardenia can reach heights of 3-6 feet and spread just as wide, but without proper pruning techniques, it can become leggy and produce fewer fragrant blooms.
The key is to trim at the right time of year and using the correct cutting methods to encourage dense growth and abundant flowers. I’ve pruned gardenias for over a decade, and these steps will help you achieve that lush, fragrant shrub you’ve always dreamed of.
Pruning isn’t just about shaping your gardenia—it’s about encouraging new growth where you want it. Gardenias bloom on new wood, meaning the flowers develop on the current year’s growth rather than old stems.
This makes light pruning in late winter or early spring the most effective time to stimulate fresh blooms. Avoid heavy pruning in fall, as this can stress the plant before winter dormancy.
Step-by-Step Gardenia Pruning Guide
- Step 1: Choose the Right Time
Prune your gardenia in late winter or early spring (February-March in most zones) before new growth begins. This timing ensures you’re not cutting back growth that could produce blooms for the current season. - Step 2: Gather Your Tools
Use clean, sharp pruning shears (sterilized with rubbing alcohol) and gloves to protect against sap irritation. Avoid dull tools, as they can tear stems and invite disease. - Step 3: Remove Dead or Diseased Wood
Start by cutting out any dead, damaged, or diseased branches at the base. Look for brown, mushy stems or signs of fungal spots—these should be removed immediately to prevent spread. - Step 4: Thin Out Crowded Branches
Focus on thinning interior branches to improve airflow and sunlight penetration. Remove branches that cross or rub against each other, as this reduces stress and disease risk. - Step 5: Shape the Shrub
Lightly trim overgrown stems to maintain your desired shape. Cut just above a leaf node or bud at a 45-degree angle to encourage outward growth. Avoid cutting into old wood, as new blooms won’t form there. - Step 6: Prune for Flowering
To encourage more blooms, cut back some of the oldest stems by about 1/3 of their length. This stimulates the plant to produce new growth from the base, where flowers often appear. - Step 7: Clean Up
Remove all pruned branches and sterilize your tools again with rubbing alcohol. Dispose of debris in the trash, not your compost, to avoid spreading disease. - Step 8: Post-Pruning Care
After pruning, water deeply and apply a balanced fertilizer (like 10-10-10) to help the gardenia recover. Mulch around the base to retain moisture and protect roots.
One common mistake I see is pruning too late in the season, which can delay new growth and reduce flowering. If you notice your gardenia has overgrown branches in summer, you can do a light trim to shape it, but avoid heavy cuts.
The goal is to maintain its natural form while keeping it healthy and blooming.
For large gardenias (4-6 feet tall), focus on structural pruning to remove branches that detract from the plant’s shape. If your gardenia is dwarf variety (1.5-3 feet), you’ll need to be more delicate with your cuts to avoid stunting its growth.
Always step back and assess the plant’s balance after pruning—this helps ensure you’re not over-trimming one side.
After pruning, your gardenia should show signs of new growth within 4-6 weeks. Look for fresh green leaves emerging from the stems you trimmed. If you don’t see new growth by late spring, your plant may need additional fertilizer or better soil conditions.
Gardenias thrive in acidic soil (pH 5.0-6.5), so a soil test can help identify if this is the issue.
Pro tip: Prune in the morning when the plant is hydrated and temperatures are cooler. This reduces stress on the gardenia and helps it recover faster. Avoid pruning on hot, windy days, as this can shock the plant and slow down its healing process.
With the right pruning techniques and timing, your full grown gardenia will reward you with larger, more fragrant blooms and a fuller, healthier appearance. Remember, gardenias are forgiving plants—even if you make a mistake, they’ll bounce back with proper care. Happy pruning! 🌸
Optimal care routine for year-round gardenia fragrance
A full grown gardenia thrives when given the right balance of sunlight, soil acidity, and consistent moisture. Unlike many shrubs, gardenias demand precise care to reward you with creamy blooms and intoxicating fragrance throughout the year.
The key lies in mimicking their natural tropical habitat—acidic soil, partial shade, and deep watering—while avoiding common pitfalls like overwatering or alkaline soil.
I’ve learned through years of gardening that most gardenia care failures stem from just two mistakes: improper soil pH and inconsistent watering patterns. A full grown gardenia (3-6 feet tall) needs well-draining, acidic soil (pH 5.0-6.5) and morning sun with afternoon shade to prevent leaf burn.
Let’s break down the exact routine that keeps my gardenias blooming year-round.
| Care Factor | Full Grown Gardenia Requirement | Troubleshooting Tip |
|---|---|---|
| Soil pH | 5.0–6.5 (acidic) | Test soil annually; amend with sulfur if pH rises above 6.5 |
| Sunlight | 4–6 hours morning sun; afternoon shade | Yellow leaves? Move to shadier spot immediately |
| Watering | Deep soak (1–2 gallons) every 3–5 days | Wilting? Check soil moisture—overwatering is worse than underwatering |
| Fertilizer | Acid-loving 8-3-9 NPK, spring/summer | Brown leaves? Reduce fertilizer strength by half |
| Pruning | After flowering (late summer/fall) | Deadheading spent blooms encourages new growth |
For soil preparation, I always start by amending the native soil with peat moss or pine bark to lower the pH. Gardenias hate alkaline conditions, which cause yellowing leaves and poor blooming.
A simple soil test kit (available at garden centers) will tell you if your soil needs sulfur or lime adjustments. Mulch with pine needles or oak leaves to maintain acidity and retain moisture—this is non-negotiable for my gardenias.
When it comes to watering full grown gardenias, I follow the "deep and infrequent" rule. 1-2 gallons per plant every 3-5 days keeps roots hydrated without waterlogging. The secret? Water at soil level (not overhead) to prevent fungal diseases like powdery mildew.
I’ve seen gardenias suffer from root rot when kept too wet, so always check the top 2 inches of soil before watering again.
Fertilizing is where most gardeners go wrong. I use a slow-release, acid-loving fertilizer (like 8-3-9 NPK) every 6 weeks during spring and summer. Skip fertilizing in fall and winter—this mimics their natural dormancy period. Over-fertilizing causes leaf burn, while under-fertilizing leads to sparse blooms.
I also avoid synthetic fertilizers; instead, I top-dress with composted pine bark for a steady nutrient supply.
Finally, let’s address the two most common issues: yellowing leaves and sparse blooms. Yellow leaves usually mean overwatering or alkaline soil. Sparse blooms? It’s often due to too much shade or lack of fertilizer.
My solution? Move the plant to a sunnier spot with morning light and feed it with phosphorus-rich fertilizer (like bone meal) to boost flowering. With these adjustments, my gardenias now bloom continuously from spring to fall.