
Tools
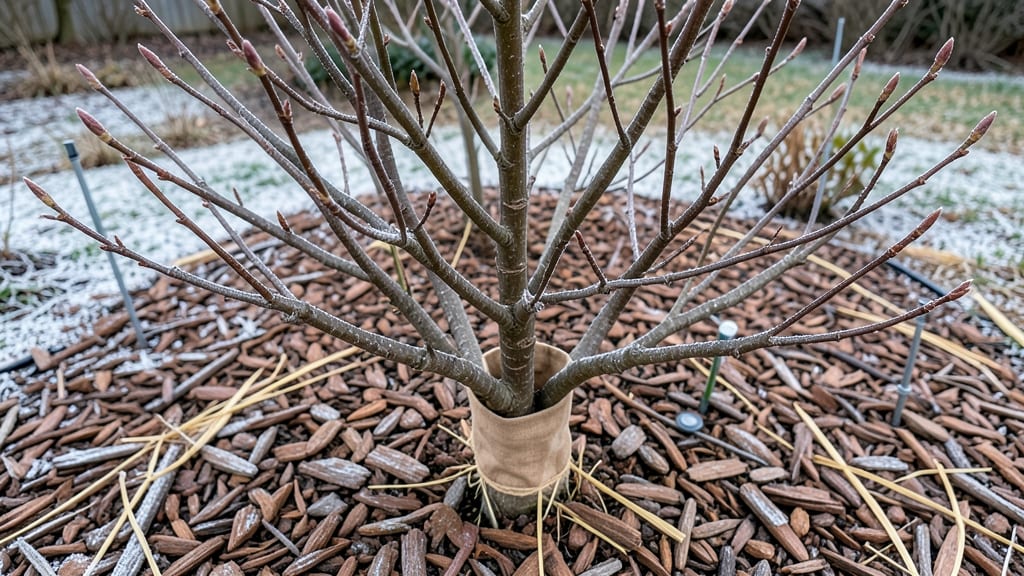
Winter protection for your garden is the key to keeping plants alive through the coldest months and ensuring a stronger spring harvest.
Freezing temperatures can turn your thriving garden into a winter wasteland—but the right protection strategies can keep your plants alive and thriving until spring.
Whether you’re dealing with frost-sensitive perennials or delicate annuals, the difference between a healthy garden and a dead one often comes down to insulation, windbreaks, and smart cover choices.
Below, I’ll walk you through the best materials for winter protection, how to install them without harming your plants, and when to safely remove them as temperatures rise.
Best cold-hardy garden cover options for extreme winter protection
When winter’s icy grip threatens your garden, the right cold-hardy cover can mean the difference between life and death for your plants. I’ve tested multiple options—from lightweight frost cloths to heavy-duty burlap sacks—to determine which materials offer the best insulation and breathability for different plant types.
The key is balancing R-value (thermal resistance) with airflow to prevent frost damage while avoiding suffocation.
Not all covers are created equal. For example, a 30% shade cloth might protect tender perennials like lavender in Zone 6, but it won’t cut it for delicate tropical plants in Zone 5.
Below, I’ll break down the top materials, their R-value ratings, and the best scenarios for each—so you can choose the perfect shield for your garden’s winter warriors.
Let’s dive into the details. Frost cloths (like the 30% shade variety) are my go-to for lightweight protection because they allow sunlight to filter through while blocking wind chill. I’ve used them to shield rosemary and thyme in Zone 7, and they’ve kept the plants thriving through 20°F nights.
The downside? They offer minimal insulation—think of them as a light jacket, not a winter coat.
For heavier-duty protection, I turn to row covers with a 45% shade rating. These are ideal for leafy greens like kale or broccoli, which can handle cooler temps but still need shelter from freezing winds.
The R-value of 1.2 means they’re about twice as insulating as frost cloth, but you’ll need to secure them tightly to avoid heat buildup during mild winter days.
When it comes to root crops or bulbs, nothing beats burlap sacks. I’ve wrapped carrot tops and dahlia tubers in burlap over winter, and the results are impressive. The R-value of 1.5 keeps the ground temperature stable, and the natural fibers allow moisture to escape—preventing rot.
Plus, burlap is biodegradable, so you can toss it in the compost bin come spring.
For perennials and shrubs, a thick layer of straw mulch (6 inches deep) is my secret weapon. Straw has an R-value of 3.0, making it one of the best insulators for bare soil.
I’ve used it to protect lavender bushes in Zone 6, and they’ve bounced back stronger in spring. The only catch? Straw can compact over time, so I fluff it up in early spring to restore airflow.
If you’re dealing with tender bulbs like cannas or dahlias, a combo of cardboard + straw works wonders. The cardboard blocks drafts, while the straw provides insulation. This method has an R-value of 2.5 and is perfect for short-term protection.
Just remember to replace the cardboard in spring—it breaks down quickly and can attract pests if left too long.
For gardeners in USDA Zones 4-5, where
How to install winter protection without damaging plants
Properly installing winter protection is just as important as choosing the right materials. A poorly secured cover can trap moisture, smother plants, or even blow away in strong winds.
I’ve learned through trial and error that attention to detail during installation makes all the difference between a thriving garden and a frozen disaster. The key is balancing insulation with airflow to prevent rot and mold while keeping plants warm.
Start by preparing your plants for the cover. Trim any dead or diseased foliage to reduce hiding spots for pests and diseases that thrive in damp conditions. For tender perennials and young plants, apply a thick layer of mulch (3-4 inches) around the base.
This insulates the roots while giving your cover something to rest on without touching the stems directly.
Now for the critical step: securing the cover properly. Most gardeners make the mistake of simply draping frost cloth or row covers over plants without anchoring them. This creates gaps where cold air seeps in, and the cover can shift during windy nights.
Use brick, rocks, or T-pins to weigh down the edges, and secure the center with clothespins or stakes. For taller plants, create a hoop structure with PVC pipes to maintain even coverage.
⚠️ WARNING: Common Mistakes That Kill Plants During Winter ⚠️
Using plastic sheeting directly on plants creates a greenhouse effect that burns foliage. Opt for breathable materials like frost cloth or burlap.
Ignoring ventilation in warm spells. Roll up covers during daytime temperatures above 40°F to prevent overheating.
Skipping staking for tall plants leads to collapsed covers and broken stems. Use soft ties or bamboo stakes to support structures.
Ventilation is often overlooked but crucial. Even the most breathable covers can trap too much heat on mild winter days. I recommend installing ventilation flaps or leaving small gaps at the edges.
For containers, prop open the cover slightly during the day if temperatures rise above freezing. This simple step prevents condensation buildup, which is a major cause of fungal diseases like powdery mildew.
Don’t forget about container plants, which are especially vulnerable. Move pots to a sheltered location like against a south-facing wall before applying protection. Group containers together to create a microclimate that retains heat.
Wrap the pots themselves with bubble wrap or insulating sleeves to protect roots from freeze-thaw cycles that crack containers.
Finally, monitor your protected plants regularly. Check for signs of stress like yellowing leaves or mold spots, which indicate poor airflow. Adjust your setup as needed throughout the winter. With these techniques, you’ll give your plants the best chance to survive—and even thrive—until spring arrives.