
Picking
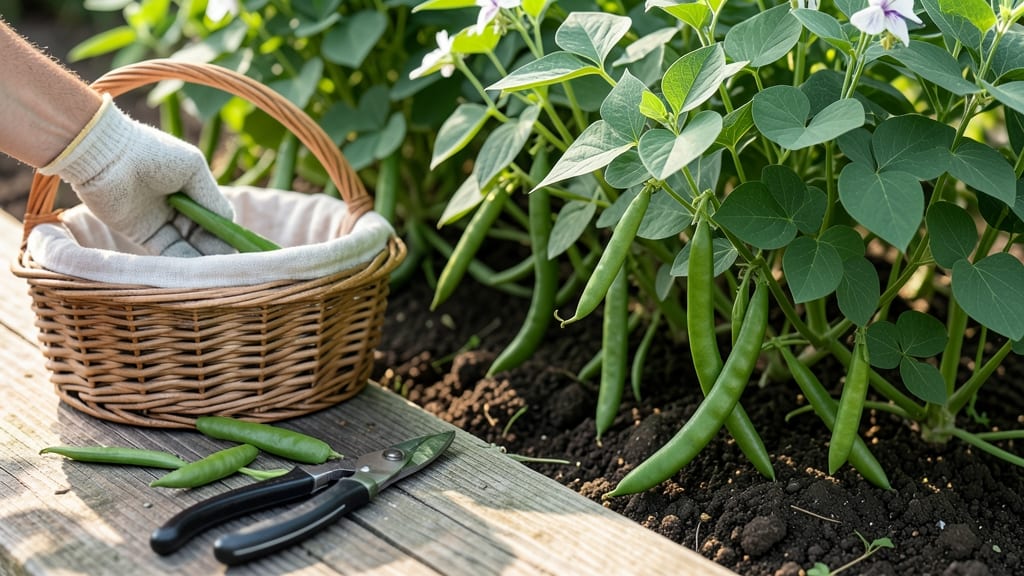
To pick green beans from your garden at the perfect moment means harvesting crisp, sweet pods that snap with flavor—before they toughen into rubbery sticks.
Imagine biting into a pod that’s still firm but just beginning to yield to pressure—this is the sweet spot every gardener aims for. Miss it, and you’re left with either underdeveloped beans or overgrown ones that taste like cardboard.
The good news? With three simple tests, you’ll never guess again.
Most gardeners focus on pod size, but the real secrets lie in color, texture, and even the sound a bean makes when bent. A deep green hue, a crisp snap, and plump but not hard seeds are your green lights.
Ignore these cues, and you risk stunted plants or wasted harvests.
In this guide, I’ll walk you through the exact visual and touch cues to time your harvests like a pro—plus how often to pick for maximum yield and flavor. No more second-guessing, just perfectly ripe beans every time.


3 Simple visual and touch tests to determine green bean readiness
Nothing beats the satisfaction of plucking perfectly ripe green beans straight from your garden. But timing is everything—harvest too early, and you’ll miss out on sweet flavor; too late, and you’re left with tough, stringy pods. The good news?
You don’t need fancy tools to tell when your green beans are ready. Just follow these three foolproof tests: pod size, color, and the snap test. These simple checks will help you avoid the most common mistakes and ensure every bean you pick is at its peak.
First, let’s talk about pod size, which is your first clue. Most green bean varieties are ready when pods reach 4 to 6 inches long.
For pole beans, you can let them grow a little longer—up to 8 inches—but bush beans typically max out at 6 inches. If you’re growing heirloom varieties, check the seed packet for specific guidelines, as some may prefer shorter or longer pods.
The key is consistency: all pods on the plant should be within 1 inch of each other in size.
Next, pay attention to the color of your green beans. Ripe beans should be a vibrant, deep green color. If they’re pale or yellowing, they’re past their prime. Some varieties, like wax beans, have a creamy white or yellow hue when ripe, so always reference your seed packet.
Avoid picking beans with any brown or black spots, as these indicate disease or pest damage. A uniform, bright color is your best friend for flavor and texture.
Here’s where things get interactive: the snap test. Gently bend a pod—it should snap crisply with a slight resistance. If it bends without snapping or feels rubbery, it’s overripe. On the flip side, if it’s too soft or mushy, it’s underripe.
This test is especially useful for pole beans, which can grow longer but still need to be firm. The snap test is your secret weapon for perfect texture every time.
⚠️ Comparison Table: Underripe vs. Overripe Green Beans
| Sign | Underripe Beans | Perfectly Ripe Beans | Overripe Beans |
|---|---|---|---|
| Pod Size | Under 3 inches | 4-6 inches (or variety-specific) | Over 6 inches, twisted |
| Color | Pale green or yellowing | Vibrant deep green | Dull green with brown spots |
| Texture | Soft or mushy | Firm but snaps easily | Rubbery or leathery |
| Seeds | Barely visible | Plump but soft | Hard and bulging |
| Taste | Bland or watery | Sweet and crisp | Bitter or starchy |
One mistake many gardeners make is waiting too long to harvest. Once green beans turn woody or the seeds inside harden, they lose their sweetness and become tough.
I’ve learned the hard way—skipping a harvest day or two can mean the difference between a crisp, delicious pod and one that’s nearly inedible. To avoid this, make it a habit to check your plants every 2-3 days during peak production. Consistency is key to a bountiful harvest.
Another pro tip: harvest in the morning when beans are at their crispest. The cooler temperatures help preserve their texture and flavor. Use a pair of sharp pruning shears or simply pinch the stem with your fingers—just avoid yanking the pods, as this can damage the plant.
If you’re growing pole beans, gently twist the pod to avoid snapping the vine. A little care now means more beans later!
Don’t forget to inspect the seeds inside the pod. At peak ripeness, they should be visible but not hard. If you can see them clearly but they’re still soft to the touch, that’s your cue to pick.
Hard seeds mean the bean is overripe and past its prime. This is especially important for dry bean varieties, which are harvested later when seeds fully mature. For fresh green beans, soft seeds are your goal.
If you’re still unsure, here’s a quick recap: size (4-6 inches), color (deep green), and texture (snaps crisply) are your three best friends. Combine these tests, and you’ll never miss the perfect moment to harvest again.
Plus, frequent harvesting encourages your plants to produce more beans, extending your harvest season. It’s a win-win!
Now that you’ve mastered the art of picking green beans at their peak, you’re ready to enjoy a garden full of crisp, sweet pods. Just remember: the more you harvest, the more your plants will give back. Happy gardening! 🌱
How often to harvest green beans for maximum yield and flavor
Harvesting your green beans at the right intervals keeps your plants productive and your pods crisp and sweet. Unlike some vegetables that thrive with less attention, green beans demand regular picking—typically every 2-3 days once they start producing.
Skipping harvests stresses the plant, leading to bitter, tough pods and reduced future yields. The key is balancing frequency with plant health, especially for bush beans (which produce all at once) versus pole beans (which yield continuously).
Your plants will signal readiness through visible cues: drooping leaves, slower growth, or pods that snap loudly but break easily. These signs mean it’s time to act before the plant shifts energy into seed production.
For bush beans, harvests may slow after 4-6 weeks, while pole beans can keep producing for 8-10 weeks if cared for properly. Understanding these differences ensures you never miss the peak harvest window.
To extend your harvest season, choose late-maturing varieties like ‘Blue Lake’ or ‘Kentucky Wonder’, which tolerate cooler temperatures better than early types. Plant succession crops every 2 weeks from late spring to early summer, staggering maturity dates.
In warmer climates, use shade cloth to protect plants from bolting (premature flowering) during heatwaves, which can cut harvests short.
One of the biggest mistakes gardeners make is harvesting too late, letting pods turn woody and stringy. Always check for plump seeds inside—if they’re visible but not hard, it’s time to pick.
For bush beans, stop harvesting when 70% of pods are mature, as the plant will decline quickly. Pole beans, however, can keep producing if you prune old pods and fertilize lightly.
After each harvest, inspect your plants for pests like bean beetles or aphids, which thrive on stressed plants. A quick spray of neem oil or soapy water can prevent infestations. Also, rotate your planting location next year to avoid soil-borne diseases, which are more likely in overworked beds.
With these tips, you’ll enjoy a longer, more abundant harvest—and fewer rubbery pods!
Remember: Consistency is key. Whether you’re growing bush beans in containers or pole beans on a trellis, sticking to a regular harvest schedule pays off with sweeter, fresher beans all season long. Happy harvesting! 🌱