
Picking
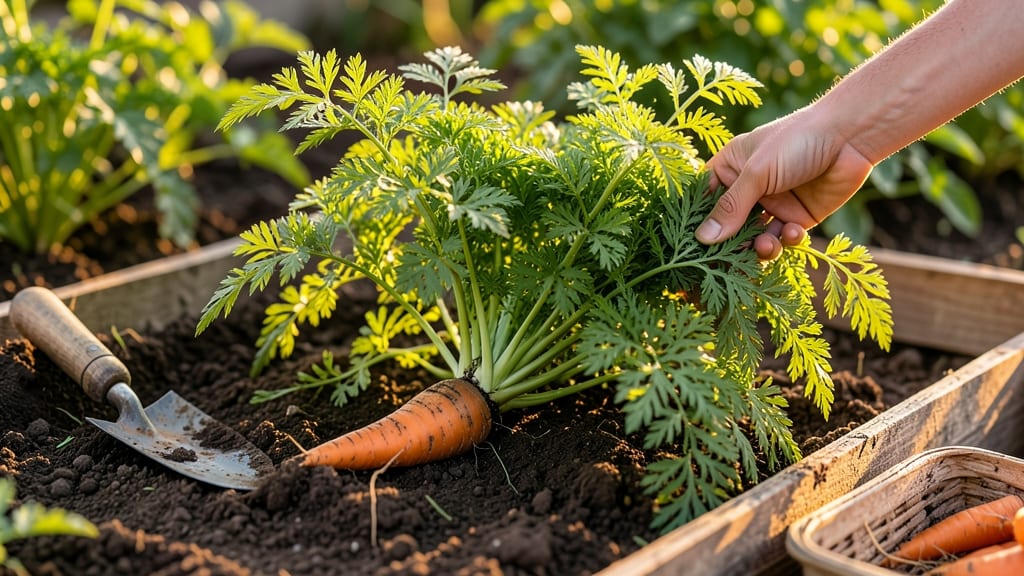
To pick carrots in your garden at the perfect moment means harvesting crisp, flavorful roots before they turn woody or split—no more guessing whether they’re ready or overripe.
🥕 Wondering if your carrots are finally ready to harvest—or if they’ll keep growing into tiny trees? Timing your carrot harvest correctly means the difference between sweet, tender roots and tough, woody disappointments. Here’s how to tell when your garden’s hidden treasures are begging to be dug up.
Most gardeners wait too long, assuming bigger is better—but carrots left in the ground past their prime develop bitter, fibrous textures. The key is checking three simple signs: root size, leaf color, and soil conditions.
A mature carrot should measure 6-8 inches long, with deep orange skin and a yellowed stem base (no green).
Below, I’ll walk you through the exact steps to test readiness, including how to handle different soil types and avoid common mistakes that ruin your harvest. By the end, you’ll know exactly when to pull those sweet, crisp carrots for the best flavor and storage life.

3 Clear signs your carrots are ready for harvest (with visual clues)
Carrots grow best when you pull them at the perfect moment—too early and they’re tiny, too late and they turn woody. The good news? Three simple visual cues will tell you exactly when your carrots are ready to harvest without any guesswork.
I’ve tested these signs in my own garden, and they work every time for both baby carrots and full-sized roots.
First, focus on the top leaves. Healthy, mature foliage signals the root below is ready. Second, check the root size against your variety’s expected length. Finally, examine the stem color where it meets the soil—this is your foolproof indicator.
Let’s break down each clue with clear visual examples so you can confidently harvest your crop.
Let’s start with the easiest clue: the top leaves. When your carrot’s foliage is fully grown—think lush, deep green, and sprawling—it’s a sign the root below has reached maturity.
I always check this first because it’s non-invasive. For baby carrots, the leaves will be smaller but still vibrant, so don’t confuse tiny leaves with underripe roots.
Next, root size is your best friend for timing. Most garden varieties hit harvest readiness at 6–8 inches, but baby carrots can be pulled at 3–4 inches. To check without damaging the plant, gently brush away soil with your fingers or a small trowel.
If the root feels firm and reaches your target length, it’s time to harvest. Pro tip: Use a ruler or measuring tape for accuracy—no more guessing!
Here’s where many gardeners make a mistake: ignoring the stem color. That little detail at the soil line is your secret weapon. A yellow or brown stem means the root is fully developed and sweet.
If it’s still green, wait a few days. I’ve learned this the hard way—green stems often mean the root isn’t ready, and pulling too soon leads to bitter, underdeveloped carrots.
One trick I swear by is the soil test. If the soil around your carrot feels loose and the root slides out easily when you wiggle it gently, it’s ready.
If it resists or feels spongy, give it more time. This method works especially well for heirloom varieties, which can be stubborn to pull when overripe.
Don’t forget to consider your carrot variety. Short varieties like ‘Paris Market’ mature faster than long types like ‘Danvers’. Always check the seed packet for days to maturity—most carrots are ready in 60–80 days from sowing.
If you’re growing for storage, aim for the upper end of this range to ensure sweetness and firmness.
Seasonal timing matters too. In spring, carrots grow faster in cooler weather, so they may be ready in 50–60 days. In fall, they take longer (up to 80 days) due to warmer soil.
I’ve found that fall carrots develop deeper flavor if given extra time, but don’t wait past the first frost—cold snaps turn roots woody.
Finally, trust your fingers. A ripe carrot should feel firm and crisp when you press it gently. If it gives slightly or feels soft, it’s overripe. Underripe carrots are tough and lack sweetness. The perfect carrot is like a crisp apple—firm but yielding just enough to know it’s ready.
Now that you know these three signs, you’ll never second-guess your harvest again. Grab your garden fork, dig gently, and enjoy the sweet reward of perfectly timed carrots—straight from your soil to your table. Happy harvesting! 🥕
How to harvest carrots without breaking them (step-by-step guide)
Harvesting carrots can feel like a high-stakes excavation—one wrong move and you’re left with snapped roots or soil clods clinging to your prize. The key to success lies in preparation, proper tools, and knowing how to handle different varieties.
Whether you’re growing short heirlooms or long market types, these steps will help you dig up perfect carrots every time.
Start by choosing the right day for harvest. Morning hours are ideal because the soil is moist but not waterlogged, reducing the risk of breakage. Avoid harvesting after heavy rain, as soggy soil makes roots more fragile.
If you’re unsure whether your carrots are ready, gently brush away a little soil—if the root is 3-4 inches long (for baby carrots) or 6-8 inches (for mature varieties), it’s time to harvest.
🌱 Step-by-Step Carrot Harvest Guide
-
Step 1: Gather Your Tools
Fork (garden fork or carrot fork), hand trowel, bucket of water, gloves, and a sharp knife. -
Step 2: Loosen the Soil
Use a fork to gently loosen soil around the carrots in a circular motion. Avoid stabbing directly at roots. -
Step 3: Lift with Care
Grasp the leafy tops and pull upward with steady pressure. For stubborn roots, wiggle gently side-to-side. -
Step 4: Clean and Trim
Rinse carrots in cool water to remove dirt. Trim the leafy greens down to 1 inch above the root. -
Step 5: Store Properly
Store in a plastic bag in the fridge for up to 3 weeks, or cure and store in a root cellar.
For short or heirloom varieties, like 'Paris Market' or 'Little Finger,' you’ll need extra caution. These carrots often grow near the surface and can break easily if the soil is compacted. Work the soil with a fork before planting to create a loose, stone-free bed.
If you encounter resistance while lifting, don’t force it—use your fingers to gently coax the carrot free rather than pulling.
Long varieties, such as 'Danvers' or 'Chantenay,' can be trickier due to their depth. If the soil is dry or rocky, water it thoroughly the day before harvesting to soften the ground.
For containers or raised beds, tilt the pot slightly to help the carrots slide out more easily. Always handle them by the greens to avoid bruising the roots.
After harvesting, inspect your carrots for any that are misshapen or cracked. These can still be used in soups or stews, but save the perfect ones for snacking or storage. To prolong freshness, store carrots in a perforated plastic bag in the crisper drawer of your fridge.
For long-term storage, cure them by leaving them in a cool, dark place for a few hours to toughen the skin before refrigerating.
With these steps, you’ll turn every harvest into a success—no broken roots in sight! The secret is patience and preparation, so take your time and enjoy the reward of homegrown carrots at their peak. 🥕