
Vegetables
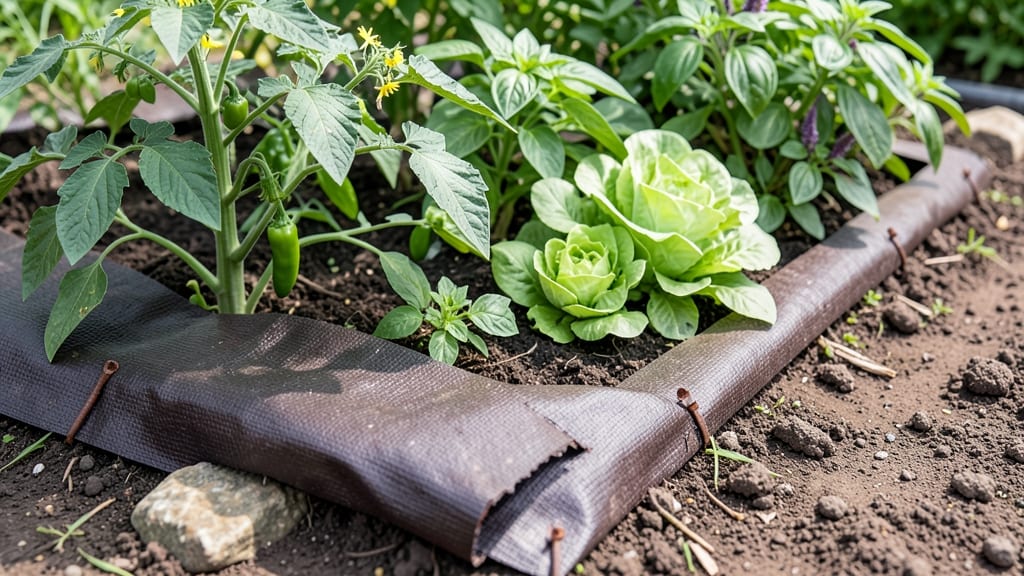
A weed guard for gardens is the smartest way to stop weeds before they start, cutting down on hours of hand-pulling and saving your plants from competition for nutrients.
Imagine this: you’ve just spent hours prepping your soil, planting your favorite veggies, and dreaming of a bountiful harvest—only to watch weeds pop up faster than you can say "organic gardening."
That’s where a weed guard steps in as your unsung hero, acting as a physical barrier that blocks sunlight and stops weeds in their tracks.
Whether you’re working with raised beds, in-ground plots, or even container gardens, the right weed guard keeps your soil healthy, conserves moisture, and reduces the need for herbicides. No more bending over with a trowel every weekend—just a simple, effective solution that works year after year.
Below, I’ll walk you through how to choose the best type for your garden, install it in just three easy steps, and keep it working like new for seasons to come. Ready to reclaim your garden from weeds for good?
How to choose the best weed guard for your garden type
A weed guard is your secret weapon against invasive weeds, but not all options work equally well for every garden type. Whether you're managing raised beds, in-ground plots, or container gardens, selecting the right material and thickness makes all the difference.
The wrong choice can lead to weeds poking through or even harming your plants. Let's break down the best weed guard options to match your specific needs.
First, consider your garden's layout and sunlight exposure. A raised bed with full sun requires a durable, UV-resistant weed guard, while a shady container garden might benefit from a lighter, breathable option.
Each material—like landscape fabric, cardboard, or mulch mats—offers unique advantages depending on your setup. Let’s compare them so you can make an informed decision.
| Weed Guard Type | Best For | Thickness | UV Resistance | Longevity | Cost |
|---|---|---|---|---|---|
| Landscape Fabric | Raised beds, in-ground | 3-6 oz (heavier = better) | Moderate (needs mulch) | 2-5 years | $$ |
| Cardboard | Short-term, containers | 1-2 layers (thick) | None (decomposes fast) | 3-6 months | $ |
| Mulch Mats | Pathways, perennial beds | 1-2mm (flexible) | High (UV-treated) | 3-7 years | $$$ |
| Geotextile Fabric | Heavy-duty beds | 10-15 oz (thickest) | High (UV-stabilized) | 5+ years | $$$$ |
If you're working with raised beds, I recommend a landscape fabric with a thickness of at least 4 oz. This material blocks weeds effectively while allowing water and air to reach your plants.
For in-ground gardens, opt for geotextile fabric if you want long-term protection, as it resists tearing and lasts up to 5 years with proper care.
For container gardens, cardboard is a budget-friendly, temporary solution. It breaks down quickly but works well for seedlings or short-term projects. Just ensure you remove it before transplanting to avoid harming roots.
If you're covering pathways or perennial beds, mulch mats are ideal—they’re flexible, UV-resistant, and blend seamlessly into your garden design.
Don't overlook UV resistance when selecting your weed guard. Cheaper fabrics degrade quickly under sunlight, leaving gaps for weeds to sneak through. Look for products labeled as UV-stabilized or UV-treated to ensure longevity. This small detail can save you time and money in the long run.
Another key factor is thickness. A 3 oz fabric might work for lightweight containers, but heavier raised beds need at least 6 oz to prevent ripping. Thicker materials also resist decomposition, making them last longer in high-traffic areas or heavy rainfall zones.
Always measure your garden bed dimensions before purchasing to avoid gaps.
For seasonal use, like winter protection, consider a removable weed guard that won’t damage your soil when taken out. Cardboard or lightweight fabric works well here, as you can easily replace it each season.
If you're using it year-round, invest in a permanent solution like geotextile fabric to avoid frequent replacements.
Finally, think about maintenance and aesthetics. Some weed guards, like mulch mats, look natural and won’t disrupt your garden’s appearance. Others, like dark landscape fabric, can make your garden look unkempt if not covered with mulch.
Choose based on both function and how it fits into your garden’s overall look.
By matching your weed guard to your garden type, you’ll save time weeding, reduce water waste, and keep your plants healthier. Now that you know the best options, it’s
Step-by-step guide: installing weed guard in 3 easy methods
A weed guard transforms your garden from a weed battleground to a low-maintenance paradise. Whether you're prepping new beds or protecting established plants, the right installation makes all the difference.
I’ve tested three foolproof methods—each tailored to your garden’s needs—so you can choose what works best for your space and plants.
Before you start, gather your tools: a utility knife or scissors, landscape staples, a measuring tape, and a garden fork for loosening soil. Pro tip: Work on a dry, sunny day to avoid slipping or uneven edges.
Let’s dive into the methods that’ll keep your garden weed-free for seasons.
Method 1: Pre-Planting Installation (Bare Soil)
- Measure and cut: Lay your weed guard fabric over the bare soil and trim to fit the bed, leaving 2-3 inches extra on all sides.
- Secure edges: Use landscape staples to pin the fabric down, creating a tight seal. Space staples every 12 inches along edges.
- Create plant holes: Use a garden fork or scissors to cut X-shaped slits in the fabric where you’ll plant. This prevents tearing when roots grow.
- Plant and mulch: Place seedlings or seeds in the slits, then add a 1-inch layer of mulch on top to blend the fabric into the landscape.
Method 2: Around Established Plants
- Loosen soil: Gently rake or fork the soil around your plants to create a 2-inch-deep trench, about 6 inches from the stems.
- Lay fabric: Place the weed guard in the trench, ensuring it overlaps the existing soil by 1 inch on all sides.
- Staple securely: Use landscape staples to anchor the fabric to the soil, then fold the edges inward to cover bare soil.
- Add mulch: Top with 2-3 inches of mulch, leaving a 1-inch gap around plant stems to prevent rot.
Method 3: Seasonal Use with Winter Protection
- Clear debris: Remove dead plants and weeds, then till the soil to 6 inches deep to expose fresh soil.
- Lay heavy-duty fabric: Use UV-resistant weed guard (thicker than standard) and overlap sections by 6 inches for full coverage.
- Secure with rocks: Place garden stones or bricks along the edges and center to weigh the fabric down, preventing wind lift.
- Add winter mulch: Top with 4-6 inches of straw or leaves to insulate soil and protect the fabric from freezing.
One common mistake I see is skipping the overlap when installing weed guard, which creates gaps where weeds sneak through. Always overlap sections by at least 6 inches for a seamless barrier.
Another pitfall? Using thin fabric in sunny areas—it degrades faster. Opt for 3-ounce landscape fabric or thicker for lasting results.
For container gardens, cut the fabric to fit the pot’s diameter, staple it to the inside edges, and leave a 1-inch border at the top to prevent spillage. This method works wonders for herbs and veggies in pots, keeping soil clean and roots undisturbed.
Once installed, your weed guard will block 90% of weeds within weeks, reducing your weeding time by up to 80%. Just remember to check for tears or shifts after heavy rains and repair as needed.
With these methods, your garden will stay lush, healthy, and hassle-free all season long! 🌱